


Lint buildup in your dryer vent isn’t just a nuisance—it’s one of the leading causes of household fires and a major reason your clothes take three cycles to dry. While professional cleaning services exist, you can often handle the job yourself with tools you already own. The trick is knowing how to adapt your existing equipment, regardless of whether you own a Dyson, Shark, Miele, or a budget-friendly shop vac. This guide walks you through the entire process of using vacuum attachments to clear lint, improve airflow, and keep your home safe—no matter which brand sits in your closet.
Why Vacuuming Your Dryer Vent Matters More Than You Think
A clogged dryer vent restricts airflow, which forces your dryer to work harder and run hotter. This inefficiency leads to longer drying times, higher energy bills, and unnecessary wear on the heating element. More critically, lint is highly flammable. The National Fire Protection Association consistently identifies failure to clean dryer vents as the leading factor in clothes dryer fires. Regular cleaning with a vacuum—even a basic one—removes the bulk of accumulated lint and restores proper airflow. You don’t need specialized equipment to make a meaningful difference; you need the right technique and a few inexpensive attachments.
Understanding Your Vacuum’s Capabilities and Limitations
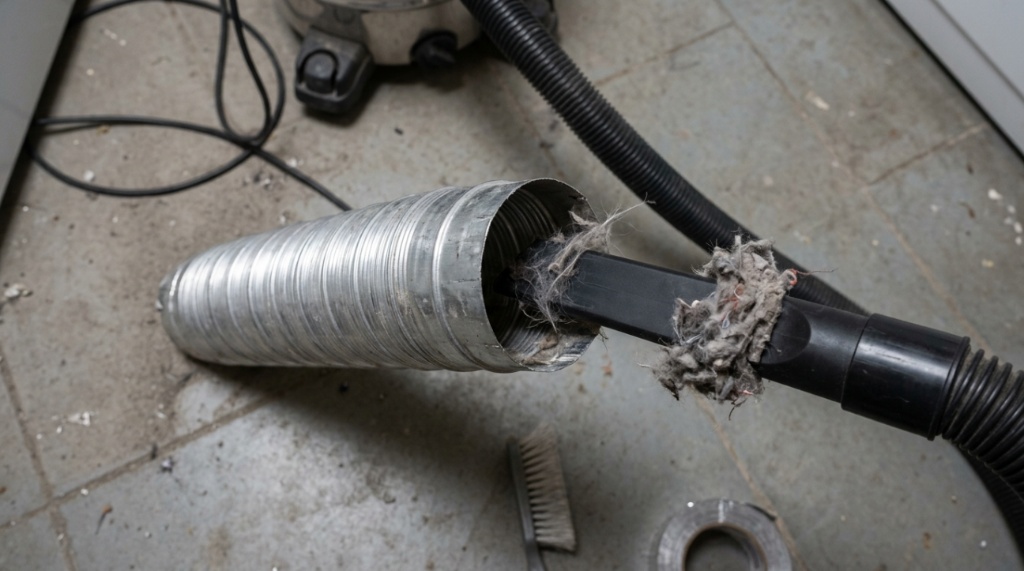
Before you start, it’s important to understand what your vacuum can and cannot do. A standard upright or canister vacuum excels at removing loose surface lint near the dryer’s lint trap and the vent opening. However, it may lack the suction power to pull deeply embedded lint from a long, convoluted duct run. A shop vac, on the other hand, offers significantly more airflow and is better suited for dislodging dense clogs. Neither type can scrub the inside walls of the duct, which is where a specialized brush kit becomes essential. The goal is to combine your vacuum’s suction with mechanical agitation to loosen and extract stubborn buildup.
Assessing Your Dryer Vent Setup
Your cleaning approach depends on your vent’s configuration. Measure the length of the duct and note how many turns it makes. A straight, short run (under 10 feet) is easy to clean with a vacuum and a flexible brush. Longer runs with multiple 90-degree bends require more patience and possibly a segmented rod kit that attaches to your drill. Also, check whether your vent exhausts through the wall, the floor, or the roof. Each configuration presents unique access challenges that will influence which attachments you prioritize.
Essential Attachments You’ll Need (and How to Use Them)
While you can clean dryer vents with vacuum attachments from any brand, you need to ensure you have the right tools. Most vacuums come with a crevice tool, but that alone won’t cut it for a thorough job. Here are the attachments that make the process effective:
- Crevice Tool: Your starting point. Use it to reach into the lint trap housing and the immediate opening of the vent duct to remove surface lint.
- Flexible Brush Kit: This is a non-negotiable for a proper cleaning. These kits typically include a flexible rod with a brush head that attaches to your drill. You insert the brush into the vent, spin it to loosen lint from the duct walls, and then use your vacuum to suck out the debris.
- Rubber Nozzle or Reducer: If you’re using a shop vac, a rubber nozzle helps create a tighter seal against the vent opening, maximizing suction. For standard vacuums, a reducer can help fit the hose snugly against the duct.
- Leaf Blower (Optional but Powerful): While not a vacuum attachment, a leaf blower is a fantastic tool for blowing lint out from the exterior vent opening. Use it in tandem with your vacuum to push debris toward the suction source.
Step-by-Step Guide to Cleaning Your Dryer Vent
Follow this process to safely and effectively clean your dryer vent using your existing vacuum. Always prioritize safety by unplugging the dryer before you begin.
Step 1: Disconnect and Prepare
Unplug your dryer and, if it’s a gas model, turn off the gas supply valve. Carefully pull the dryer away from the wall. Disconnect the duct from the back of the dryer and also from the wall exhaust vent. This gives you full access to the entire duct run.
Step 2: Vacuum the Lint Trap Housing
Remove the lint filter and use your vacuum’s crevice tool to reach into the slot where the filter sits. You’ll be surprised by how much lint accumulates here. This area is often overlooked but is critical for preventing lint from being pulled into the duct in the first place.
Step 3: Clean the Duct from Both Ends
Attach your flexible brush kit to a drill. Insert the brush into the duct from the dryer side and slowly push it through, letting the spinning action dislodge lint from the walls. Work in sections, pulling the brush back frequently. As you loosen lint, use your vacuum to suck it out. Repeat this process from the exterior vent opening to ensure you cover the entire length of the duct.
Step 4: Use Your Vacuum for Final Extraction
After brushing, use your vacuum with a rubber nozzle or reducer to create a seal against the duct opening. Run the vacuum for a minute or two to pull out any remaining loose lint and debris. If you have a leaf blower, you can also blow from one end while vacuuming from the other to dislodge any final stubborn clogs.
Step 5: Clean the Exterior Vent Cover
Go outside and remove the vent cover. Use your vacuum to clean out any lint, leaves, or bird nests that may have accumulated. This is a common point of blockage that many people forget. Reattach the cover securely.
Step 6: Reassemble and Test
Reconnect the duct to both the dryer and the wall vent. Plug the dryer back in and run a load on the air-dry or fluff setting for about 15 minutes. Go outside and place your hand near the vent cover. You should feel a strong, steady airflow. If the airflow is weak, you may have a deeper clog that requires professional attention,For industrial manufacturing applications requiring dust-free material handling, discover Vacuum Conveyor Moves Powder Safely.
Common Mistakes to Avoid During the Process
Many DIY attempts fail due to a few common errors. Avoid these pitfalls to ensure your efforts are effective:
- Using a Vacuum Alone: Suction alone cannot remove lint that has adhered to the duct walls. You must use a brush to agitate the lint first.
- Ignoring the Exterior Vent: The outside vent cover is a primary collection point for lint and debris. Skipping this step means you’re only cleaning half the system.
- Using Flimsy Attachments: A standard crevice tool is too short and inflexible to navigate a long duct. Invest in a quality flexible brush kit.
- Forgetting to Unplug the Dryer: This is a serious safety hazard. Always disconnect power before working on the appliance.
- Not Cleaning the Duct Itself: Some people only clean the lint trap and the immediate area. The duct is where the dangerous buildup occurs.
How Often Should You Clean Your Dryer Vent?
There is no one-size-fits-all answer, but a good rule of thumb is to clean your dryer vent at least once a year. However, you should increase the frequency if you notice any of the following signs:
- Clothes take longer than one cycle to dry.
- Clothes come out hotter than usual.
- The dryer itself feels hot to the touch.
- You notice a burning smell coming from the dryer.
- The exterior vent cover doesn’t open or has weak airflow.
Households with large families, pets, or long duct runs may need to clean every six months. Regular maintenance not only prevents fire hazards but also extends the life of your dryer by reducing strain on its components.
When to Call a Professional Instead
While vacuuming is effective for routine maintenance, some situations require professional intervention. If you have a very long duct run (over 25 feet), a complex vent path with multiple turns, or a duct that goes through the roof, professional cleaning equipment may be necessary. Professionals use high-powered rotary brushes and industrial vacuums that can handle severe clogs. If you’ve attempted a thorough cleaning and still notice poor airflow, or if you suspect a blockage in a section of the duct you cannot reach, it’s time to call a certified technician. The cost of a professional cleaning is a small price to pay for the safety of your home.
Frequently Asked Questions
Can I use a regular vacuum cleaner to clean my dryer vent?
Yes, you can use a regular vacuum cleaner, but it’s most effective when paired with a flexible brush kit. The vacuum’s suction removes the loosened lint, while the brush dislodges it from the duct walls. A shop vac is more powerful, but a standard vacuum will work for routine maintenance.
What is the best vacuum attachment for a dryer vent?
The best attachment is a flexible brush kit that connects to a drill. This allows you to mechanically scrub the inside of the duct. For the vacuum itself, a rubber nozzle or a reducer helps create a tight seal against the vent opening to maximize suction power.
How do I clean a dryer vent without a special kit?
If you don’t have a brush kit, you can use a leaf blower to push lint out from the exterior vent while using your vacuum to catch it from the inside. You can also try using a long, flexible pole with a cloth attached, though this is less effective than a proper brush.
Is it safe to use a vacuum to clean a gas dryer vent?
Yes, it is safe as long as you turn off the gas supply valve and unplug the dryer before you begin. Never attempt to clean the vent while the dryer is connected to power or gas.
How do I know if my dryer vent is clogged?
Common signs include clothes taking multiple cycles to dry, a burning smell, the dryer exterior feeling excessively hot, and weak airflow from the exterior vent cover. If you notice any of these, it’s time to clean your vent.
Conclusion
Cleaning your dryer vent is a straightforward task that yields significant safety and efficiency benefits. You don’t need to buy an expensive, specialized system; your current vacuum, combined with a modestly priced brush kit, is more than capable of handling routine lint removal. By understanding your vacuum’s limitations, using the correct attachments, and following a systematic process, you can prevent fire hazards, lower your energy bills, and extend the life of your dryer. Make vent cleaning a part of your annual home maintenance routine, and you’ll enjoy the peace of mind that comes with a safer, more efficient home.




+ There are no comments
Add yours