You’ve saved up, planned the trip, and you’re standing on the shore ready to capture the session of your life. But if you’re reading this, you probably already know the sinking feeling of watching a wave crash over your gear and wondering if your camera will survive the salt. The ocean is unforgiving, and choosing the wrong gear can turn an epic memory into a very expensive paperweight. Selecting a reliable action camera for saltwater isn’t just about picking the most expensive model on the shelf; it’s about understanding waterproofing ratings, corrosion resistance, and the specific realities of shooting in a marine environment. This guide breaks down exactly what you need to look for, the trade-offs you’ll face, and how to keep your investment safe from the sea.
Why Saltwater Is Different from Freshwater
Most people assume that if a camera is waterproof, it’s ready for the ocean. That’s a costly misconception. Freshwater and saltwater present entirely different challenges to electronics and housing materials. Salt crystals are abrasive, and the salt itself is highly corrosive to metal components, including charging ports, buttons, and the internal chassis of the camera.
When you submerge a camera in the ocean, you aren’t just exposing it to water; you’re exposing it to a conductive, electrolytic solution. If saltwater breaches the seals, it can short-circuit the device instantly. Even if the water doesn’t get inside, the salt residue left behind after evaporation can corrode the external microphone mesh, degrade the rubber gaskets, and eventually seize up the buttons. This is why a camera that works perfectly in a swimming pool might fail after just a few sessions in the surf. You need a device that is not only sealed but also built with materials that resist this specific type of degradation.
Key Specifications to Look For
When you start comparing models, the spec sheet can be overwhelming. However, for saltwater use, there are three critical areas you need to focus on: the depth rating, the housing material, and the battery door design. Ignoring these in favor of higher frame rates or resolution will lead to disappointment.
Depth Rating vs. Real-World Surf Conditions
The depth rating tells you how far down the camera can go without leaking. A rating of 10 meters (33 feet) is standard for most action cameras. This is sufficient for snorkeling and most surfing scenarios, as you rarely dive deeper than a few meters. However, the rating doesn’t account for impact. When a wave slams you into a reef or the camera smacks the water at high speed, the pressure on the housing spikes momentarily. Look for a camera with a rating of at least 10 meters, but prefer models with reinforced housings if you plan on heavy wave impact. If you are shooting from a board mount, the water pressure is rarely the issue—the impact is.
Housing Materials and Corrosion Resistance
Check what the camera body and buttons are made of. High-quality models use a combination of polycarbonate for the body and stainless steel or titanium for the screws and buttons. Titanium is the gold standard for saltwater because it does not corrode. Stainless steel is good, but it can still pit over time if the coating is scratched. Avoid cameras that use exposed aluminum or untreated metal parts on the exterior, as these will show signs of corrosion quickly. The lens cover should be scratch-resistant glass, not plastic, because sand and salt will scratch plastic covers, ruining your image quality.
The Battery Door and Gasket Seal
The battery door is the most vulnerable point on any action camera. It is a removable part, which means it relies on a rubber gasket to keep water out. Over time, these gaskets dry out, crack, or get sand stuck in them. When selecting a camera, look at how the door latches. A double-latch system is safer than a single latch. You should also check if the gasket is replaceable. If the manufacturer doesn’t sell replacement gaskets, the camera has a limited lifespan for saltwater use. Before every session, inspect the gasket for hair or sand—a single strand of hair can create a capillary channel for water to enter.
Essential Features for Ocean Shooting
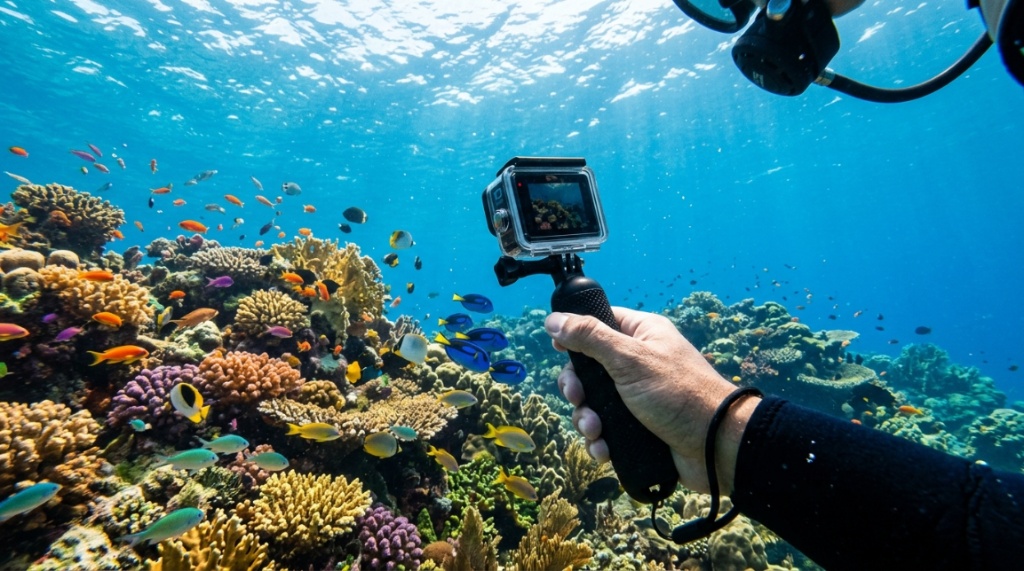
Beyond surviving the environment, you need the camera to perform well in the specific lighting and motion conditions of the ocean. Water absorbs light and shifts colors, so your camera needs specific capabilities to capture footage that looks true to life.
Color Correction and White Balance
As you go deeper, red and orange light wavelengths are absorbed first, making footage look blue or green. While you won’t be diving deep on a surfboard, even a meter of water depth will wash out colors. Look for cameras that offer a “diving mode” or “underwater white balance” preset. This adjusts the color temperature to compensate for the loss of red light. If the camera doesn’t have this, you will need to shoot in a flat or log color profile to color-correct in post-production. This is a crucial feature that separates a good ocean camera from a great one.
Image Stabilization
In the ocean, you are never still. Even on a calm day, you are bobbing on the surface. Without good stabilization, your footage will look like a shaky mess. You need electronic image stabilization (EIS) or gimbal-like stabilization built into the camera. This is non-negotiable for surf or paddleboarding footage. The stabilization will smooth out the high-frequency vibrations of the water and the lower-frequency movements of your body. Check for the latest version of the stabilization software, as older versions can cause a “jelly” effect in the footage when panning quickly.
Front Screen and Mounting Options
If you are vlogging or taking selfies in the water, a front-facing screen is essential for framing your shot. However, keep in mind that the touchscreen can be finicky when wet. Water droplets on the screen often cause the touch controls to act erratically. Look for a camera with physical buttons that can control the record function, so you don’t have to rely on the touchscreen to start or stop recording while in the water. Also, consider the mounting system. A standard GoPro-style mount is the industry standard, giving you access to a wide range of surfboard mounts, chest straps, and handheld grips.
Battery Life and Cold Water Performance
Batteries drain faster in cold water, and they drain even faster when recording in high resolutions. The ocean is often cooler than the air temperature, which impacts battery chemistry. You should expect significantly shorter battery life in the water than on land. It is wise to carry at least two or three spare batteries for a day of shooting.
There is also a specific issue with batteries and saltwater: the metal contacts. If saltwater gets into the battery compartment, it will corrode the contacts immediately. After removing the battery, check the contacts for any signs of moisture or salt residue. Some cameras have a “battery saver” mode that limits the frame rate or screen brightness to extend recording time, which is useful if you are on a long paddle and can’t change batteries.
Common Mistakes to Avoid
Many users damage their cameras not during the shoot, but during the cleaning process. The way you rinse and dry your camera is just as important as the camera you buy. Here are the most common errors that lead to premature failure.
Rinsing with High-Pressure Water
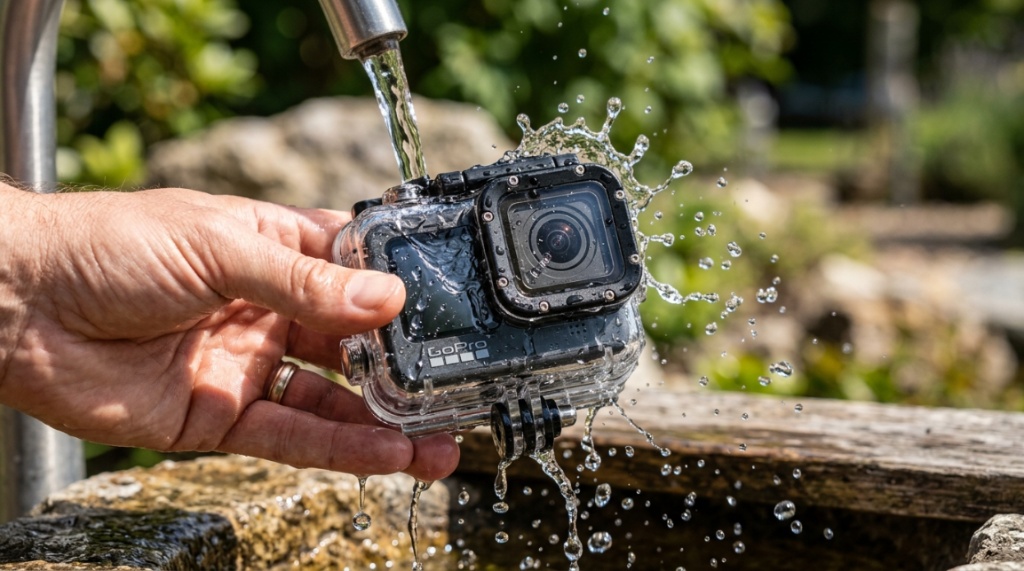
It seems logical to blast the salt off with a hose, but high-pressure water can force saltwater deeper into the crevices and even push past the gaskets. Always rinse your camera in a bucket of fresh water. Gently swish it around to remove the salt. If you use a hose, use a gentle, low-pressure flow and avoid pointing the water directly at the speaker holes or microphone mesh.
Letting the Camera Air Dry with Salt Residue
You must rinse the camera immediately after exposure to saltwater. If you let the salt dry on the camera, it becomes abrasive and corrosive. After rinsing, dry the camera with a soft microfiber cloth. Do not leave it in the sun to dry, as UV rays can degrade the rubber seals. Instead, leave it in a shaded, well-ventilated area to air dry completely before closing the battery door. Storing a camera with a damp gasket will promote mold growth and corrosion.
When handling industrial powders in wet or corrosive environments, ensuring dry transfer systems are utilized correctly parallels how marine electronics need specialized care; for more on secure material handling, learn how a Vacuum Conveyor Moves Powder Safely.
Ignoring the Audio Mesh
Saltwater is notorious for ruining action camera microphones. The tiny holes in the microphone mesh are easily clogged with salt crystals. Once clogged, the audio becomes muffled or distorted permanently. After rinsing, you can use a piece of “Blu Tack” or a soft adhesive to gently press against the mesh to pull out any remaining salt crystals. Do not use a pin or a needle to poke the mesh, as this will break the waterproof membrane behind it.
Maintenance Routine for Longevity
To ensure your camera lasts for years of ocean use, you need a strict maintenance routine. This is not optional; it is the price of admission for shooting in the sea. The routine takes about five minutes but saves you hundreds of dollars in replacements.
- Immediate Rinse: Rinse the camera in fresh water immediately after leaving the water. Swish it gently for at least 30 seconds.
- Soak the Mounts: If you use a metal mount or quick-release buckle, soak it separately in fresh water. These parts often corrode faster than the camera because they are cheaper metal.
- Dry the Gaskets: Open the battery door and remove the battery. Wipe the gasket dry and inspect it for sand or debris.
- Air Out: Leave the battery door open in a dry, shaded place for a few hours to allow any trapped moisture to evaporate.
- Lubricate (If Needed): Some housings have O-rings that require a silicone grease. Check your manual. If the O-ring looks dry, apply a very thin layer of silicone grease to keep it supple.
Finding the right action camera for saltwater involves balancing your budget against the harsh realities of the marine environment. It is better to buy a slightly older model with a proven track record for durability than a brand-new model with fancy features but a plastic housing that won’t hold up to the salt.
Budget Considerations and Trade-offs
You don’t need to buy the most expensive flagship camera to get good saltwater footage, but you do need to be aware of the trade-offs you are making with cheaper models. Budget cameras often lack the color correction software and have weaker stabilization. They also tend to have lower quality gaskets.
If you are on a tight budget, prioritize the housing durability and the stabilization over the resolution. A 1080p video that is stable and in focus is far more valuable than a 4K video that is shaky and blurry. Also, consider the cost of accessories. A good floatation handle is essential to prevent your camera from sinking to the bottom of the ocean. A floaty is a cheap insurance policy compared to the cost of a new camera.
Frequently Asked Questions
Can I use a regular waterproof camera in the ocean?
Yes, but only if it is rated for the depth you are diving to and you are willing to perform rigorous maintenance. However, “waterproof” cameras that are not action cameras often lack the stabilization and mounting options needed for surfing or paddleboarding. They are fine for casual snorkeling but not for high-motion activities.
How deep can I take my action camera?
Most standard action cameras are rated to 10 meters (33 feet) without an external housing. If you are free diving deeper than that, you will need a dedicated underwater housing. For surfing and snorkeling, the 10-meter rating is usually sufficient.
Is it safe to use the touchscreen underwater?
No. The touchscreen will not function correctly underwater due to the conductivity of the water. You should rely on physical buttons to start and stop recording. Some cameras have a “water mode” that disables the touchscreen to prevent accidental inputs.
How do I remove salt crystals from the speaker?
Use a soft-bristled toothbrush or a piece of adhesive putty to gently lift the crystals out of the mesh. Never use compressed air, as this can push the salt deeper into the device. A gentle rinse in fresh water followed by a soft brush is the safest method.
Will the warranty cover saltwater damage?
Usually, no. Most manufacturers consider saltwater damage to be a result of user error or negligence, even if the camera is rated as waterproof. It is essential to check the warranty terms before purchasing. Often, you will need to rely on third-party insurance if you want coverage for ocean use.
Conclusion
Choosing a camera for the ocean is a decision that should be made with your head, not just your eyes. The flashiest 8K footage means nothing if the camera corrodes after three months. Focus on the fundamentals: a robust housing, corrosion-resistant materials, reliable gaskets, and excellent stabilization. Remember that the camera is only half the battle; your post-session maintenance routine is what truly determines the lifespan of your gear. Take the time to rinse, dry, and inspect your equipment after every single saltwater exposure. By prioritizing durability and committing to a strict cleaning regimen, you can capture stunning ocean footage for years to come without constantly replacing your gear.