
A riding buddy replaced his entire drivetrain — chain, cassette, and chainring — three times last season at a total cost of $720. I ride the same trails, same mileage, same conditions, and spent $75 on two chains. The difference is not better equipment or gentler riding. It is chain lubrication timing, cleaning discipline, and knowing exactly when to replace a chain before it destroys everything it touches. Chain wear prevention on long mountain bike adventures is not complicated, but it is unforgiving — skip one cleaning cycle in abrasive conditions and you accelerate wear that compounds exponentially with every subsequent mile. A chain that reaches 0.5% elongation costs $30 to replace. That same chain at 0.75% has already damaged your $80 cassette and $60 chainring, turning a routine $30 replacement into a $170 overhaul. This guide teaches you the monitoring, maintenance, and timing strategies that keep your chain in the safe zone through thousands of miles of mountain biking.
What Actually Causes Chain Wear on Mountain Bikes?
Chain wear is caused by abrasive particles grinding between chain pins and bushings (rollers) during articulation — each time a chain link bends around a cog, contaminated surfaces rub under load, removing microscopic metal and gradually elongating the chain beyond specification.
The wear mechanism in detail:
- Primary cause (80% of wear): Abrasive contamination (dust, dirt, sand) between pin and bushing surfaces. Under load, these particles act as cutting compounds that remove metal with every chain articulation.
- Secondary cause (15% of wear): Metal-on-metal contact when lubrication fails. Without a lubricant film separating pin from bushing, direct steel-on-steel friction removes material through adhesive wear.
- Tertiary cause (5% of wear): Corrosion from moisture exposure. Rust creates rough surfaces that accelerate abrasive and adhesive wear rates.
Key insight: chain “stretch” is not actually the chain stretching like a rubber band. It is the pins wearing smaller within the bushings, creating play that accumulates across 100+ links into measurable elongation. A chain measuring 0.5% longer than new has not stretched — its internal components have been ground away by contamination.
This means: preventing contamination from reaching internal surfaces is the single most effective wear-prevention strategy. Proper lubrication creates a barrier film. Proper cleaning removes contamination before it accumulates to damaging levels.
How Do You Measure Chain Wear Correctly?
Measure chain wear using a dedicated chain checker tool — insert the gauge into the chain while on the bike under light tension, and read whether the chain has reached 0.5% (replacement warning) or 0.75% (immediate replacement required to prevent cassette damage).
Measurement protocol:
- Tool options: Park Tool CC-3.2, Pedro’s Chain Checker Plus, or any quality go/no-go gauge. Digital calipers also work (measure 12 links pin-to-pin; new = 12.000 inches, 0.5% = 12.060 inches, 0.75% = 12.090 inches).
- When to measure: Every 300–500 miles in clean conditions, every 200–300 miles in dusty/abrasive conditions. Also measure after any ride where the chain sounded notably dry or noisy.
- How to measure: Place the chain checker on the upper chain run (between chainring and cassette) under light pedal pressure. The tool drops between rollers if wear exceeds its calibration.
- Reading results:
- 0.5% on 11/12-speed: Replace now (narrow chains damage cassettes faster)
- 0.5% on 9/10-speed: Warning — replace within 200 miles
- 0.75% on any speed: Replace immediately; cassette damage likely already occurring
- 1.0%+: Chain may skip under load; cassette and chainring likely need replacement too
The most expensive measurement mistake: not measuring at all. Many riders run chains to 1.0%+ because they never check, then wonder why a new chain skips on their now-destroyed cassette.
What Is the Optimal Lubrication Schedule for Long Rides?
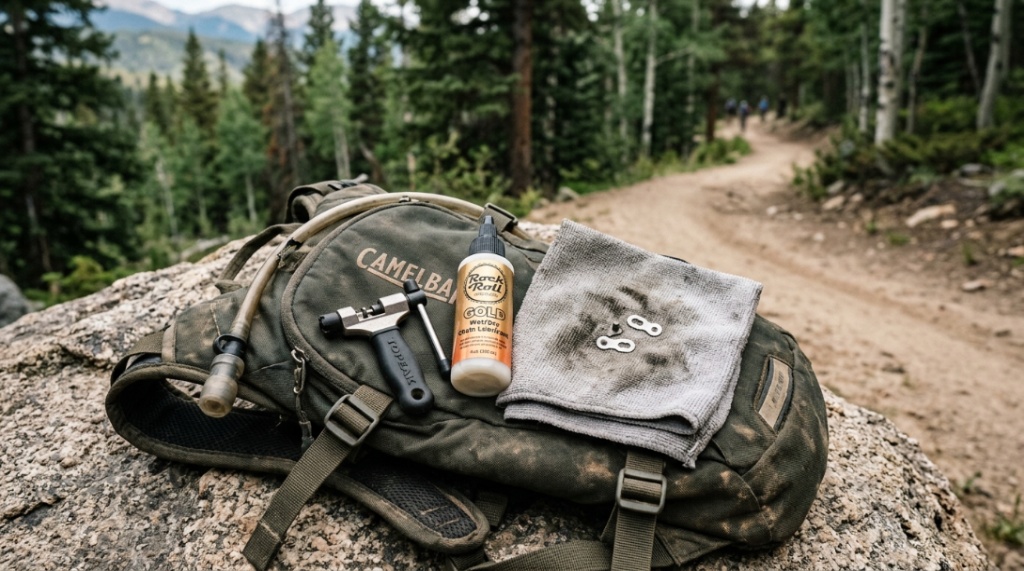
For long mountain bike adventures (30+ miles), apply fresh lube before departure, carry a small bottle for mid-ride reapplication every 25–40 miles in dusty conditions, and clean/relube thoroughly within 24 hours after every ride to prevent overnight contamination bonding.
Lubrication timing by ride type:
| Ride Type | Pre-Ride | Mid-Ride Reapplication | Post-Ride |
|---|---|---|---|
| Short ride (under 20 miles, low dust) | Verify lube from last application | Not needed | Wipe chain, relube if next ride is 3+ days away |
| Medium ride (20–40 miles, moderate dust) | Fresh application night before | One mid-ride application at 20–25 miles | Wipe chain, deep clean if visibly contaminated |
| Long ride (40–60 miles, dusty) | Fresh application night before | Two applications (at 20 and 40 miles) | Full clean and relube within 24 hours |
| Epic ride (60+ miles, multi-day) | Fresh application + carry full bottle | Every 20–30 miles or when noise increases | Complete drivetrain service at end |
The critical timing insight: lubrication failure does not cause instant damage. It creates a vulnerability window where contamination enters unprotected surfaces. The longer the window stays open, the more damage accumulates. Closing that window quickly (through timely reapplication) prevents the exponential wear that ruins drivetrains.
How Does Riding Technique Affect Chain Longevity?
Cross-chaining, high-torque low-cadence grinding, and shifting under full power accelerate chain wear by 30–50% compared to smooth spinning in appropriate gears — proper technique extends chain life as much as proper lubrication.
Technique factors that affect wear:
- Cross-chaining (big-big or small-small): Extreme chain angles increase lateral force on link plates, causing accelerated side wear and roller deformation. Stay within the middle 80% of your gear range to minimize lateral stress.
- Low cadence + high torque: Grinding up hills in too-high gears puts maximum force on each chain articulation point. Higher cadence in a lower gear distributes the same power across more revolutions with less force per revolution.
- Shifting under load: Forcing gear changes while pedaling hard causes chain to jump between cogs under tension, creating impact forces that accelerate pin and roller wear. Ease pedal pressure during shifts.
- Consistent gear selection: Using the same 2–3 cogs exclusively concentrates wear on those cogs while leaving others new. Use your full gear range to distribute wear across all cassette positions.
Practical application: maintain cadence above 70 RPM whenever possible, ease pressure during shifts, avoid extreme cross-chain positions, and use your full gear range. These habits add zero time to your ride while extending chain life 30–50%.
When Should You Replace a Chain to Prevent Cascade Damage?
Replace your mountain bike chain at exactly 0.5% wear for 11/12-speed drivetrains or 0.75% for 9/10-speed — this prevents the worn chain from grinding matching wear patterns into your cassette and chainring, which would cause a new chain to skip on the damaged cogs.
The cascade damage cycle:
- Stage 1 (0–0.5% wear): Chain elongates slightly. Fits cassette teeth properly. No component damage occurring. Replace here and the rest of the drivetrain is unaffected.
- Stage 2 (0.5–0.75% wear): Chain no longer sits perfectly on cassette teeth. Teeth begin wearing to match the elongated chain pitch. Damage is beginning but may be reversible with immediate chain replacement.
- Stage 3 (0.75–1.0% wear): Cassette teeth are visibly shark-finned (worn to points). Chainring teeth show asymmetric wear. A new chain will skip on these damaged cogs because they no longer match standard pitch.
- Stage 4 (1.0%+ wear): Chain skips under power. Entire drivetrain requires replacement — chain ($30–$50), cassette ($50–$150), chainring(s) ($40–$100). Total: $120–$300 that a $30 chain replacement at Stage 1 would have prevented.
The math is simple: three chains replaced at 0.5% wear ($90 total) outlast and outperform one chain run to failure plus full drivetrain replacement ($200+). Proactive replacement is always cheaper than reactive repair.
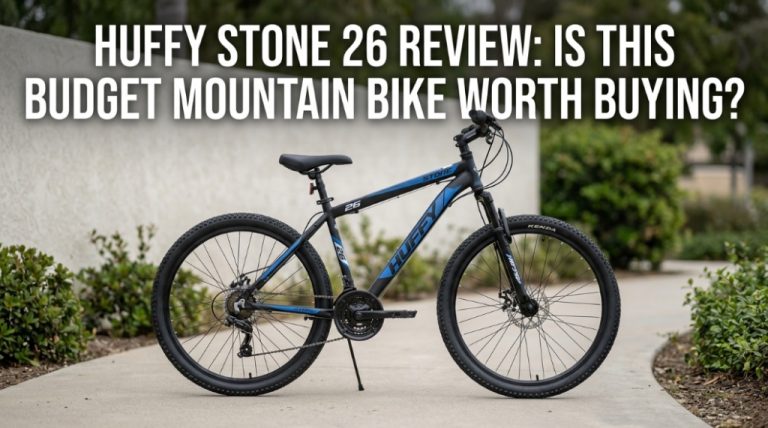
Maintaining a clean drivetrain is critical regardless of the price point of your rig. While high-end groupsets suffer from accelerated wear under heavy mud, entry-level setups require just as much vigilance out on the trails. For instance, as noted in our comprehensive Huffy Stone 26 Review, stock drivetrains on recreational models are highly susceptible to shifting hesitation if grit builds up. Consistently stripping away old grease and monitoring your link stretching will prolong the lifespan of your components, keeping your budget-friendly adventurer rolling smoothly through harsh terrain.
What Additional Practices Extend Mountain Bike Chain Life?
Beyond lubrication and timely replacement, storing your bike in dry conditions, using a chain watcher to prevent drops, running appropriate chain length, and matching chain quality to drivetrain investment all contribute to maximum chain longevity on mountain bike adventures.
Additional longevity practices:
- Dry storage: Moisture accelerates corrosion that roughens internal surfaces. Store indoors, wipe down after wet rides, and never leave a wet bike overnight without drying the chain.
- Chain tension: Proper derailleur setup ensures consistent tension across all gears. Too little tension allows chain slap that impacts link plates against chainstays. Too much tension increases friction wear.
- Chain length: Correct chain length (proper wrap around largest cog without over-extending derailleur) ensures smooth articulation. Too-short chains stress links on big-cog combinations.
- Quality matching: Use chain quality appropriate to your drivetrain investment. A $15 chain on a $200 cassette wears faster and damages expensive components. Match chain tier to cassette tier.
- Post-ride immediate care: Wipe the chain within 30 minutes of finishing a dusty ride. Contamination bonds more strongly to surfaces as lubricant dries and temperatures normalize.
For specific product recommendations and maintenance schedules tested on demanding mountain bike adventures, chain lubrication strategies tested on Utah adventures provides proven maintenance protocols from riders who consistently achieve 2,500+ miles per chain in abrasive conditions.
Conclusion
Preventing chain wear during long mountain bike adventures combines three disciplines: proper lubrication (right product, right timing, right application), consistent cleaning (removing abrasives before they damage), and timely replacement (at 0.5% before cascade damage begins). Add smart riding technique — higher cadence, eased shift pressure, full gear range usage — and you extend chain life by 30–50% beyond what maintenance alone provides.
The riders who spend the least on drivetrain replacement are not the ones who buy expensive components. They are the ones who maintain cheap chains perfectly. A $30 chain replaced three times at proper intervals costs $90 and protects a $200+ cassette for its full lifespan. A $50 premium chain run to destruction costs $50 plus $200+ in cassette and chainring replacement. Discipline beats dollars every time in chain longevity.
How many miles do you get from a chain on your local trails — and what habit made the biggest difference? Share your experience below.
Frequently Asked Questions
How many miles should a mountain bike chain last?
With proper maintenance in moderate conditions: 2,000–3,000 miles for 11/12-speed chains, 3,000–5,000 miles for 9/10-speed chains. In abrasive desert conditions: reduce by 30–40%. Without proper maintenance: chains may reach 0.5% wear in as few as 500–800 miles. The variable is entirely maintenance quality, not chain quality.
Does chain brand matter for wear resistance?
Higher-tier chains (Shimano Dura-Ace/XTR, SRAM XX, KMC X) use harder pins, better plating, and tighter manufacturing tolerances that resist wear slightly better than budget chains. However, maintenance discipline matters 5–10x more than chain brand. A perfectly maintained budget chain outlasts a neglected premium chain every time.
Can I repair a worn chain?
No. Chain wear is material removal from internal components — the metal is gone and cannot be restored. “Stretching” a chain back is physically impossible. The only solution is replacement. However, cleaning a contaminated chain prevents further wear acceleration, and proper lubrication after cleaning restores smooth operation even on a partially worn chain.
Should I replace my chain early if it still shifts fine?
Yes — replace at the measurement threshold (0.5%) regardless of how it feels. A chain at 0.5% often still shifts acceptably because it has worn its matching cassette to fit. The problem appears when you install a new chain on the worn cassette — skipping occurs because the cog teeth no longer match standard pitch. Replace the chain before this cascade begins.
Does single-speed or internal gear hub eliminate chain wear?
Single-speed drivetrains experience less wear than geared systems because the chain runs straight (no lateral flex) and articulates over fewer cogs. Internal gear hubs reduce wear further by eliminating external derailleur systems. However, contamination-based wear still occurs — lubrication and cleaning remain important regardless of drivetrain configuration.
Is it worth buying a chain with special coatings?
Chains with nickel plating, titanium nitride coating, or DLC (diamond-like carbon) treatment resist corrosion and reduce surface friction. They provide measurable improvement (10–20% longer life) in wet conditions where corrosion is a factor. In dry/dusty conditions where abrasion dominates, the coating benefit is smaller (5–10%) because the wear mechanism attacks internal surfaces where coatings are minimal.
How does e-bike torque affect chain wear?
E-bike motors generate significantly higher torque than human legs alone, accelerating chain wear by 40–60% compared to identical conditions on acoustic bikes. E-MTB riders should check chain wear every 200–300 miles and use premium chains with reinforced construction designed for motor-assisted torque levels. Lubrication intervals should also be shortened by 30%.


+ There are no comments
Add yours